
How To Make A 6-Bobbin Plying Kate
Today's post is my first Tutorial! Some of my harebrained schemes are so much fun that I wonder if anybody else might want to do them too; hence; a How To. This is the blog post I wished somebody else had written before I started, so on the chance that anyone else is wondering the same things I was, here is what I learned...
As a beginning spinner, I went looking to experiment with plying together 4, 5, and 6 singles. Clever beastie that I am, I noticed right away that the first consideration for this would be the number of bobbins I own: 4. Need to order more bobbins anyway; Check. Next is the issue of controlling that many strands of string while twisting them around one another: The Kate that came with my spinning wheel holds 3 bobbins. Need another Kate. Can you ply effectively with your strands coming off of multiple Kates? Probably, but I bet it's easier if you have one unit for all the strands (Could the experienced spinners among you kindly weigh in on this issue? I really do wonder). My best Google-Fu yielded exactly one candidate for purchase (a real beauty, too). Made by Will Taylor, and available here, this brilliant device has only two limitations:
1. Price, and 2. Availability.
As I would learn, the price of the Will Taylor model turns out to be more than fair, in light of the costs of the materials, and the effort required to make it all happen. So my advice to begin with is this: If you just want the best tool for the job, fork over the $110, then hurry up and wait the four or more months it will take for you to get the real thing. However, if, like me, your fiber arts allowance
and ability to wait patiently are equally limited, you CAN make your own. If I can do it, anyone can, and it's way fun, too. My kids helped out, so I can also tell myself the experience was instructional for them, too.
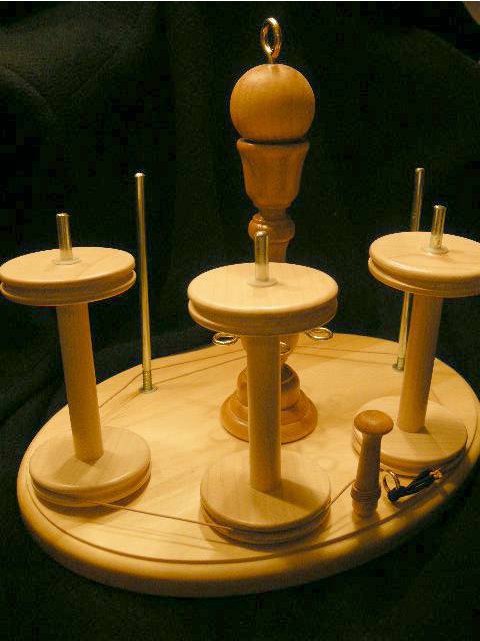
Here's our Kate - It holds 6 bobbins, and it really works. Or it will, as soon as the rest of my bobbins arrive:

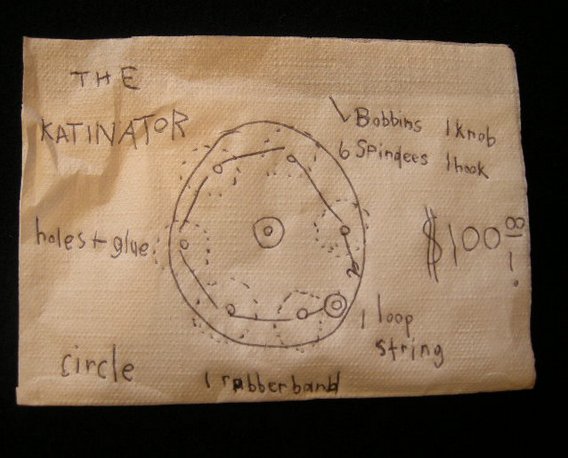
Here is the plan that the Smallies and I drew together (back of a napkin after dinner one night). I only show it to you because it has such a Wile E. Coyote "Super-Genius" quality. We discussed how it would work, what we would need to make it, and the cost of the original vs. our knockoff.
Here are the materials I amassed. A major chain craft store yielded the following:
1 Basswood plaque, 9.5" x 12.5"
1 Shaker-style peg
1 turned candlestick
1 round, flat-bottomed doll's head
I found all of these in the unfinished wood aisle, exchanged about $20 for them, and went on my way. I then drilled holes (shown with threaded reinforcements inserted) in the plaque, the candlestick, the tension peg, and the round ball, as seen below. We determined placement for the bobbin peg holes by cutting out a paper pattern of the plaque and folding it into equal wedges. I am math-challenged and measurements often derail me, so I'll do anything to avoid them when I can.

We then traveled to the Helpful Hardware Store, where knowledgeable Hardware Codgers (yes, they do still exist, but not usually in the big box home improvement stores) helped me to choose the following, in addition to the threaded reinforcements seen above:
1 Double-ended screw (shown in top of candlestick)
6 1/4" x 6" hex bolts (more on them below)
7 Size 8 solid brass screw eyes
1 Size 12 solid brass screw eye
2 Yards of rawhide lacing (feel free to substitute cotton string for this)
I left around $30 at the hardware store for this lot, which also included some polyurethane finish and 220 sandpaper, not shown.
Also pictured, found lying around my house, are a ponytail elastic, and a cabinet knob screw of unknown origin (probably removed from my car's tire at some point).

The real nail-biter of this project for me was the question of what in the world I would use as bobbin shafts, and how I would secure them to the base. Fortunately, it was nothing to worry about, once I consulted the proper Hardware Codger. I brought in my 3-bobbin Kate and a bobbin to show him. He agreed with me that Hex bolts would make a fine choice, being long and slender enough, and also conveniently threaded at the ends. He was also kind enough to both cut off the hex heads, and file the ends smooth on all 6 of my bolts. It took him about 90 seconds, with no audible cursing, neither of which would have been the case had I done it myself. Knowledgeable Hardware Codger did affirm that this part of the process could have been done at home, by me, with a hacksaw and a file.

Once the part-procurement was over, I embarked on the wood-finishing phase. We used three coats of rub-on polyurethane for all the wood pieces, sanding with fine paper in between.
Then we set about combining parts. I installed the large screw eye (after drilling a pilot hole for it) in the top of the ball.

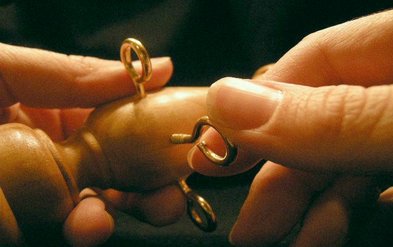
I did the same with 6 of the small screw eyes, spaced evenly around the thickest part of the candlestick. I used a piece of masking tape to mark the locations for drilling the pilot holes.
Next, we connected the ball to the top of the candlestick, with the help of that double-ended screw.

Flipping over the plaque, we drove the screw through the pilot hole in its center (countersunk, if you are wondering, so the plaque will sit flat when in use).

Then the center post (I think it has ceased to be a candlestick at this point, no?) was threaded onto the screw, back on the top side of the plaque.

Here is the 7th small screw eye, installed in position for the tension cord. I attached the ponytail elastic (ideally need a smaller one, I think - this one is doubled), and then tied the cord to it.

Here I am screwing the bobbin shafts into place. I used the reinforcements because our Basswood base is very soft. Without them I could have used super-duper glue of some kind, or even better, started out with a base made of harder wood.

Last of all, I threaded the tension cord through the hole I had drilled in the tension peg, and trimmed the cord to length, tying a knot in the end to keep it all together.

And here she is, in all her finished and functional glory.
For those keeping track, I'm in about $50, and 2 evenings. If my time is worth anything (and it is to me), then you can see why I say this is not really a money-saving venture over the commercially available model. In terms of having a fun project with my kids though, and the immediate gratification of having our Kate done in way less than four months, I'd call it a win.
And if you have stuck with me all the way to the end of this epic, here's a small reward: Let's have a contest! This beauty needs a name (Campbell favors "The Katinator", but I think we might consider alternatives). Please send your suggestions (either via comments or the contact form). I'll proclaim the winner with Great Fanfare in 30 days, and send you a Lovely Parting Gift, as well!